90R100KA1CD60L4F1E03GBA303024 high pressure pump
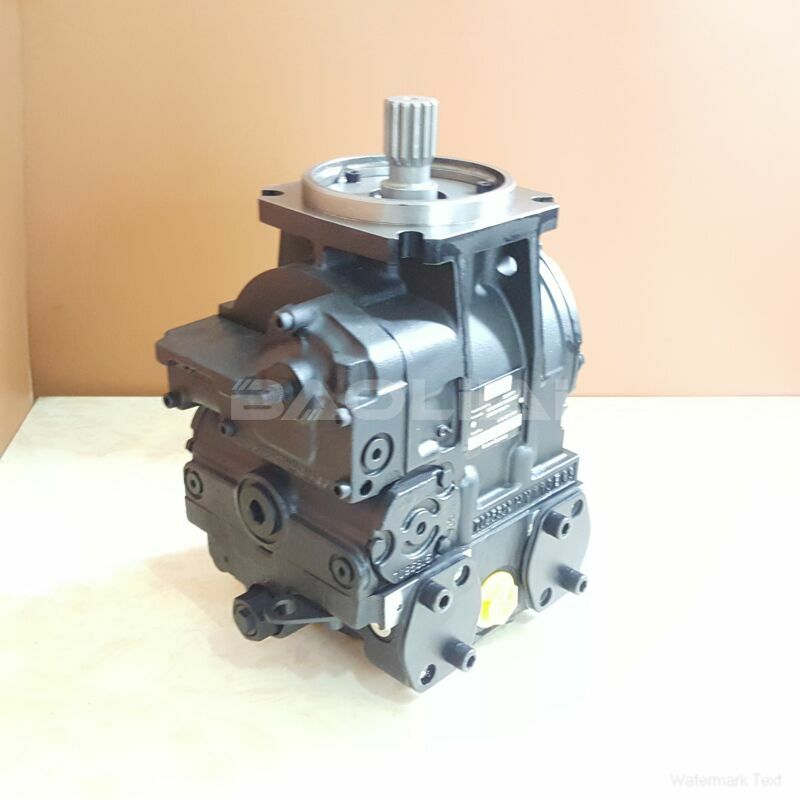
90R100KA1CD60L4F1E03GBA303024 high pressure pump

- Product Details
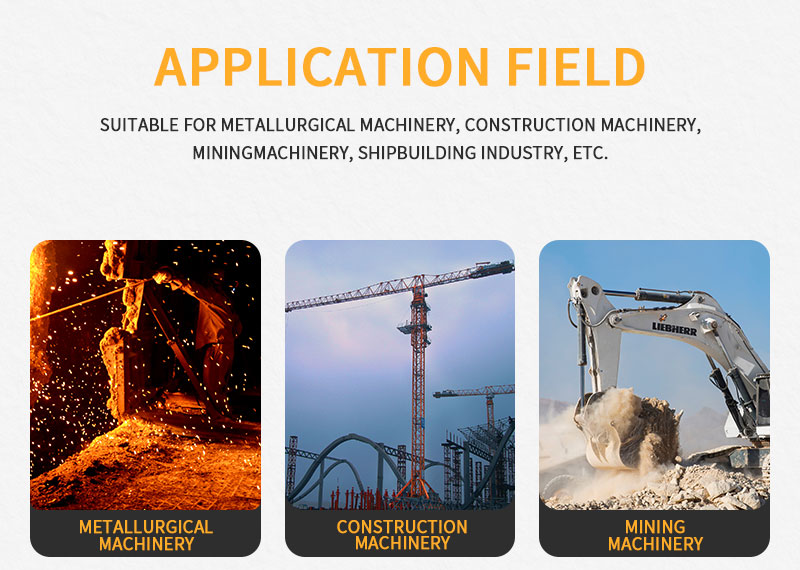
- Applicable Scene
Rebuilding a hydraulic pump can seem like a daunting task, but with the right tools, materials, and guidance, you can restore its functionality and extend its lifespan. This guide will walk you through the process step by step, ensuring you can tackle this project with confidence.
90-R-100-KA-1-CD-60-L-4-F1-E-03-GBA-30-30-24
90R100KA1CD60L4F1E03GBA303024
Step 1: Gather Tools and Materials
83055006
Before you begin, collect the necessary tools and materials. You will need:
A clean workspace
Safety goggles and gloves
Wrenches (various sizes)
Screwdrivers (flathead and Phillips)
Torque wrench
Pliers
Hydraulic oil and seal kits
Cleaning solvent
Rags and brushes
A container for small parts
Step 2: Disconnect the Pump
Safety is paramount. Start by turning off the hydraulic system and isolating the pump from its power source. Disconnect all hydraulic hoses and electrical connections carefully. Label each connection for easy reassembly.
Step 3: Remove the Pump from its Mounting
Using appropriate wrenches, remove the nuts and bolts securing the pump to its mounting bracket. Take care during this process to prevent any damage to the surrounding components. Place the pump on a clean, flat surface for disassembly.
Step 4: Disassemble the Pump
Begin disassembling the pump by removing any covers or casings. Use a screwdriver to remove screws and a wrench for bolts. Keep track of all parts and hardware, as you will need them for reassembly. Take photos during disassembly to help with the reassembly process.
Step 5: Inspect Components
Once disassembled, carefully inspect each component for wear and damage. Look for signs of corrosion, cracks, and scoring on the surfaces. Replace any worn or damaged parts with new ones from a seal kit or manufacturer.
Step 6: Clean All Parts